Instructions
Configuration
- Open /includes/config-sample.php and save it as config.php.
- Set $config['Sandbox'] to TRUE if you wish to run test transactions against the PayPal sandbox. If you are ready to process live transactions, set this to FALSE.
- Set $config['ApiSelection'] to the value which represents the API platform you will be using with your PayPal account. Valid values are:
- PayPalPro-DDP = PayPal Website Payments Pro 3.0 (DoDirectPayment)
- PayPalPro-PayFlow = PayPal Payments Pro 1.5 / 2.0 (PayFlow Gatway)
- PayPal-Rest = PayPal REST API
- Scroll down to the section of the config file where you enter the API credentials for the platform that you specified in step 3. Then enter your API credentials into the correct location. Be sure to enter sandbox credentials and live credentials into their correct placeholders!
- Adjust any other optional settings in the config file to suit your needs.
USBSwiper Credit Card Reader
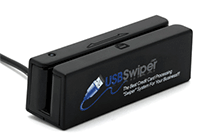
If you would like to swipe credit cards and have all of the card data entered automatically for you to save time you will need a USB credit card reader.
Any reader that is configured as keyboard emulation and reads both track 1 and track 2 of the credit card stripe will work.
We recommend purchasing one from our partner USBSwiper if you do not already have one. The solution has been fully tested with USBSwiper card readers.
Basic Usage
Credit / Debit Card Info
- If you are using a credit card reader, swipe the card with the cursor located in the swipe field at the top of the form. Otherwise, type all credit card details into their proper fields.
- Choose a Transaction Type:
- Sale - Process the payment and immediately move funds into the PayPal account.
- Auth - Authorize the credit card, but do not process the funds immediately. To capture the funds later and finalize the transaction you will need to log into your PayPal account, find the transaction, and click the capture button within the transaction details.
Payment Info
- Enter your order totals including the net amount and optional shipping, handling, and tax details.
- Enter an invoice number for your records (optional).
- Enter an item name and any notes you would like to associate with the order.
Billing Address
- Set the "Enter Billing Address" switch to ON if you would like to include a billing address.
- Enter the billing address of the credit card into the corresponding fields.
Shipping Address
- If you do not need to include shipping on the order, simply set the "Shipping Not Req." switch to ON.
- If you would like to use the same address for shipping that is entered for billing, set the "Same as Billing" switch to ON.
- If the shipping address will be different, enter the address into the corresponding fields.
Process Payment
- Click the "Process Payment" button to submit the transaction to PayPal.
Required Fields
The billing address may or may not be required by PayPal depending on how your account was vetted when you were approved to process credit cards and/or how you have your Fraud Management Filters (Risk Controls) configured in your PayPal account.
Supported Credit Card Types
- Visa
- MasterCard
- Discover
- American Express
- JCB
- Maestro
PayPal Errors
Refer to PayPal's API error documentation for more details on specific error codes you might see.
Community Support
Get answers directly from Angell EYE support as well as community users in our PayPal POS Virtual Terminal forum.
Premium Support
If you need more direct help or cannot wait on answers from the community you may submit an order for premium support.
GitHub Repo
If you would like to submit bug reports, feature requests, or contribute to the solution you may follow our GitHub repo.